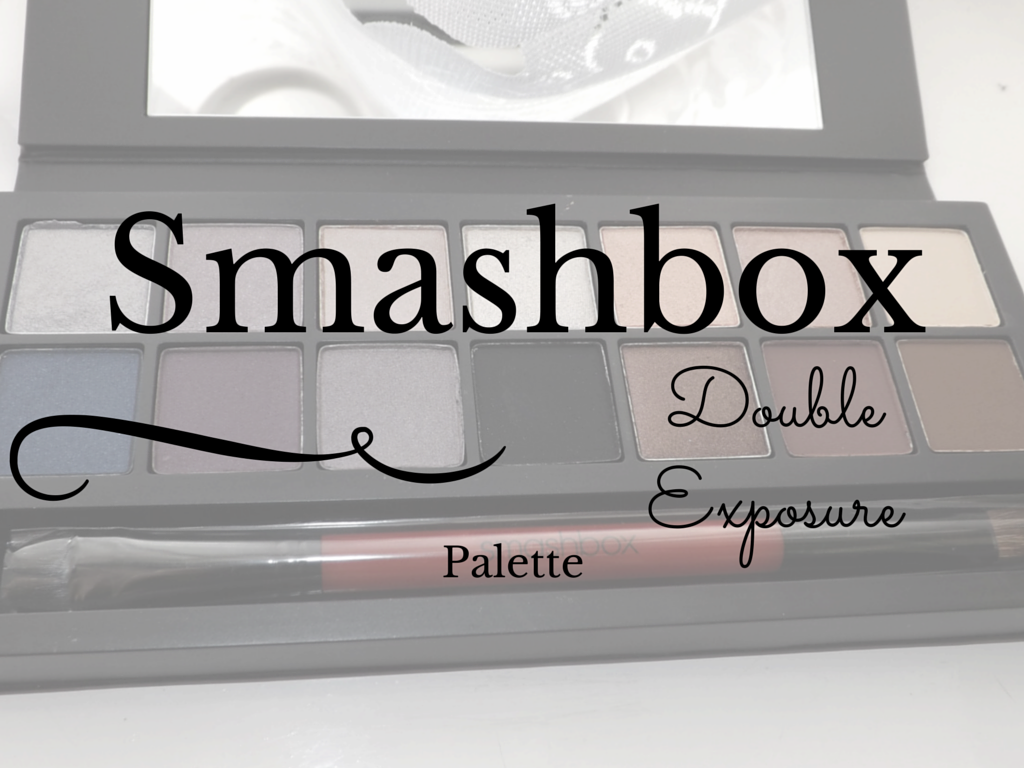
Smashbox Double Exposure Palette Review and Tutorial
The Smashbox Double Exposure Palette contains 14 eye shadows that can be turned into 28 shades just by using a dampened brush. This versatile palette retails for £37 and contains a mixture of gorgeous eye shadows, a dual ended brush and an eye shape chart guide. I have also done a tutorial at the end of this blog post using this palette.
.JPG)
.JPG)
When you open the lid of the palette, there is a leaflet with all the shades in this palette and how they transform when their wet. All you need to do is dampen the brush and the shadows don't glaze over and they dry as good as new. I use the brush dampened with water but you can use mixing mediums if you prefer. Not everyone will have a mixing medium, I don't, but water works just as well.
.JPG)
Top Row: Silver (Shimmer), turns metallic
Mauve (Satin), turns metallic
Peony (Shimmer), turns metallic
Blanc, (Shimmer), turns metallic
Quartz (Shimmer), amps up vibrancy
Flushed (Shimmer), gets deeper
Veiled (Satin), amps up vibrancy
Bottom Row: Midnight (Satin), adds sparkle
Temper (Satin), adds sparkle
Haze (shimmer), gets deeper
Noir (matte), gets deeper
Copper (Shimmer), turns metallic
Fig (Matte), gets deeper
Espresso (Matte), gets deeper
.JPG)
With this palette, you get a double ended eye shadow brush. One end is a short, dense rounded brush which is great for packing on the colour to the eyes, and the other is an angled brush which is good for smoked out lines or for the crease.
.JPG)
Dry top row from left to right:
Silver, Mauve, Peony, Blanc, Quartz, Flushed, Veiled
.JPG)
Dry bottom row from left to right:
Midnight, Temper, Haze, Noir, Copper, Fig, Espresso
.JPG)
Wet top row from left to right:
Silver, Mauve, Peony, Blanc, Quartz, Flushed, Veiled
.JPG)
Wet bottom row from left to right:
Midnight, Temper, Haze, Noir, Copper, Fig, Espresso
.JPG)
I love the pigmentation of both the wet and dry shadows. The wet shadows definitely transform into different consistencies and I especially love those darker shades on the bottom row because they appear to be packed full of sparkle, like the first four colours on that row.
I like the range of colours, they are a lot more original than the Full Exposure palette, however they are mainly pink and purple tones, with some darker shades like blue and black.
The consistencies of the eye shadows are smooth and creamy when they are wet or dry, and they blend really easily. Application was actually quite easy and both wet and dry shadows last such a long time and are so pigmented on the eyes and look absolutely amazing.
Overall I prefer this palette to the original Full Exposure palette because this has a nicer range of colours and is a lot more versatile in terms of application.
For the makeup look, you can use either water or mixing mediums on the brush to use these shades wet, whatever you use is up to you. I used water but I have seen tutorials where people using mixing mediums, and both are just as effective as each other. Begin by priming the eye and applying a white eyeliner base.

Pat the shade 'Flushed' all over the lid using a dampened brush. This is going to make the shadow deeper and create a nice opaque base colour on the lid.

Use the angled end of the brush that comes with the palette to trace the crease using the shade 'Copper' which is metallic. Then take a clean fluffy blending brush to blend and soften the colour through the crease. Transition the crease shade using 'Veiled' and highlight under the brow bone with 'Blanc'.

Using a fluffy blending brush, dampen the bristles and fluff the shade 'Temper' on the outer corner. Wait until it is dry and then use a clean fluffy brush to repeat the same process with 'Temper' but dry, and blend into the crease and lid colour to add some depth to the eyes.

With the angled end of the brush from the palette, use some of the shade 'Noir' to create a wing extending from the outer corner about 1-1.5cm long, and then create a sharp corner and extend it into the crease. Use a fluffy blending brush to blend it and soften the edges.

With the angled brush, dampen the brush and mix together Noir and Temper and apply this on the outer half of the lower lash line.

With a dry angled brush, apply 'Flushed' on the inner half of the lower lash line and highlight the inner corner with 'Veiled'.

On the upper lash line create a winged line using liquid eyeliner. Curl your lashes and apply mascara. I added some false eyelashes to add to the drama and intensity of the eyes.

I am creating an ombre lip and using Essence Lip Liner in Honey Berry on the outer corners of the lips and around the edge of the lips.

I then applied Natural Collection Lipstick in Caramel to blend in with the lip liner, then finished off with Natural Collection Lip Gloss in Lychee Twist.


Have you tried the Smashbox Exposure Palettes?
SparkleEyes x


This looks so pretty! I was torn between this and full exposure but ended up going for the original but as much as I love it, I was a little disappointed with the payoff on the shimmers, such a nice look you did with it too :)
ReplyDeleteSurelyChar
Thank you so much!
DeleteI agree, the pigmentation of these eye shadows are better than the original Exposure palette. This one is definitely my favourite out of the two :) x