Posts

Showing posts from 2012

Christmas Countdown: Morning and Night Skincare Routine

Image
Hey guys! In less than a week is Christmas, and over the next week I want to get something up, so today is my morning and night skincare routine. Above is a photo of the products I use in a day.When I wake up, I use a cotton wool ball and the Deep Pore Anti-Blemish Cleanser from Good Things, followed by the Miracle Mattifying Moisturiser. After that, I use the Bright Eyes Cream and Spot Clearing Gel if I need it. In the evening, I use the Stay Clear Cleanser, and one night a week I use the Facial Mask. After cleansing, I use the Moisturiser and the Eye Cream.

Winter Wear: Touch Screen Gloves

Image
Hey guys This morning I want to tell you some really awesome accessories for winter and they are these touch screen gloves from Primark for £2 i think. If you are a student and you stand in the cold waiting for school, these gloves are perfect even if you have a touch screen phone! There is a special material on the end of your first finger and thumb on each hand so you can still use your phone without taking your gloves off. One size fits all I think so they are stretchy and pretty durable so they will last all winter!! So thats it for now SparkleEyes xx

Christmas Catalogue: Beauty Gift Ideas

Image
Hey guys Christmas is fast approaching and so many shops have Christmas sales and products for you to buy. Today I have a fabulous gift idea for you to buy for a teenager, someone who is just starting with makeup, even if you don't have a lot of money! The product is from Boots and is £10, only available for Christmas. It is called Colours by Technic and contains 4 blushers, 2 bronzers, 12 lip glosses, 64 eyeshadows, blusher brush, lip brush and 2 eyeshadow applicators. For £10, the eyeshadows are such amazing quality and have a high quality pigmentation. This is suitable for a teenager because its everything a younger teen needs. I have this and I am so impressed, the palette in itself is just the right size, very thin and easy to carry in a case etc.. There are so many tutorials you can do from this, from smokey eyes, neutral eyes and there are  colours to suit every eye colour. Overall, this is a really good buy for a teen these are some of the swatches from the palette: .

GlamRox Lip Tutorial

Image
Hey guys Tonight I want to do this lip tutorial which is inspired by some youtubers who have already done this look. Its incredibly simple, but looks great!! First, apply a lipstick. I used MUA shade 12. Next, stick on the rhinestones in any order. I did silver and gold on the tip and bottom lip. I used Anita's rhinestone wheel. So, it is pretty simple and I hope you guys liked this :) SparkleEyes x

Top Tip 6: Organizing Your Wardrobe Space

Hey guys, You might already know this but two weeks ago my furniture came in and I have it all organised now, I am considering doing a room tour but it's not exactly finished yet, I still have some pictures I want on the wall and my desk are still needs to be organised and I've dedicated half term next week to do that. Today's top tip is organising your wardrobe space. The rail in my old wardrobe went vertical and I hate vertical rails!! In my new wardrobe, on one side there are two rails going horizontal and the other side has one rail with three internal drawers down the bottom. I have loads of tips for wardrobe organization and they are all here. The first tip is having matching hangers - you can buy hangers from Argos or Wilkinsons very cheap. I recommend plastic hangers instead of wood or velvet ones. The velvet can wear away and wooden hangers are more expensive and don't have as easy a grip. My second tip is hang jumpers with jumpers, dresses with dresses

Fairy Inspired - Forest Fairy

Image
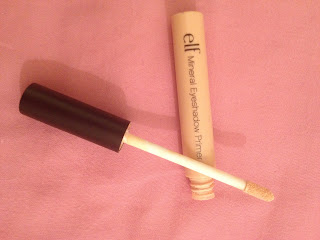
Hey guys So today I decided to upload a tutorial I've been working on for a few days now and it's called 'Forest Fairy'. I'm actually thinking of doing more fairy based tutorials and this is the first one. It is very green and sparkly, I used rhinestones because they were there and they looked really awesome in the look so this is how I did it :) (I'm hoping my laptop doesn't die while I'm making this!!) First thing: prime your eyes. I use the ELF eyelid primer because its extremely cheap and it helps eye shadow stay on for longer. So just use the wand to apply a bit on your eyes and blend it in with your finger.   I used two greens from the ELF clutch palette. I sweeped the lightest green on my eyelids and used that bright green there in my crease.  I lined my eyes with a silver glitter eyeliner. This is 2True eyeliner dazzler in... you guessed it... silver! Use the mid sized rhinestones in silver/gold (or any colour you ha

Halloween Tutorial - Spiderweb Eyes

Image
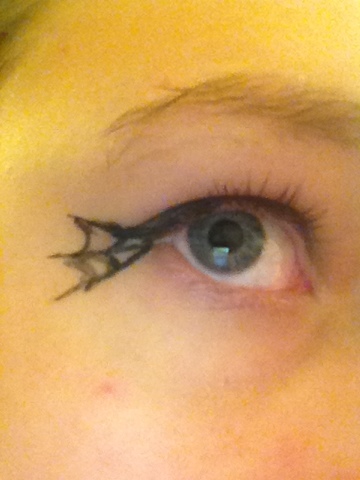
Hey guys Sorry nothing has been updated in a while, I have been busy. Today I decided to do a Halloween themed tutorial, this is the first of three. It is quite simple and wearable for Halloween if you don't like dressing up. It's very simply a smokey eye with a small spiderweb coming out the side of my eye and you can wear this on both eyes or just one. I will show you how to do it of the picture isn't very self explanatory -_- Basically, to do the spider web you need to draw three lines (like crows feet) from the outer corner of your eye. Then join the lines with ) shapes, as in the picture Hope you guys like this and stay tuned for more halloween tutorials!! SparkleEyes xx

Top Tip 5: Preventing Smudged Eyeliner

Hey guys First, sorry this tip is late :( This tip you might have figured out but just in case you haven't... When you wear liquid eyeliner it tends to rub off during the day but if you get your primer and prime your eyes before you put the liner on, it will stay for a lot longer. Hope this tip helped and I will get another one up tomorrow hopefully SparkleEyes x

Another Haul!! Primark,Superdrug and More!

Hey guys  Watch the video here to see what I bought today :0 SparkleEyes xxx  http://www.youtube.com/watch?v=-uZOUiX3VH8&feature=youtu.be

Top Tip 4: Autumn Makeup!

Hey dudes!! So, Autumn is upon us now, seems only yesterday I said this about summer!! Anyway, I have a brand new makeup routine for Autumn which I'll try to remember to put up, but this tip of the day is basically just tips about colours and prodcucts to wear this season. First, ditch the hot pink lipstick you had for summer. Summer is gone !! :( For lighter skin tones, swap it for a softer light pink or even a natural colour. For dark skintones, keep hold of a deep red shade and for skin tones in between, try more orangey-browney shades for more darker skin tones. During the Autumn when it rains and tends to be a little bit colder, I don't wear as little makeup as in Summertime. Because the cold makes red patches appear on my face, I tend to put a little bit of tinted moisturizer on just to even it out, plus concealer. I'll most likely ditch blusher all together because my cheeks get quite rosy in Autumn, however I will spring for bronzer to define my face.  A

Top Tip 3: Cleaning Makeup Brushes

Hey guys so today's top tip is all about cleaning brushes and making sure that you do it properly. Cleaning brushes is very important because the build up of makeup, dirt and other things can cause infections on you if you go to long without cleaning them. However, there is a specific way to clean brushes without damaging the glue that holds the bristles.  When you clean your brushes, point the bristles down when under running water so the water can't damage the glue and the brushes. Also, when drying brushes, point them down so the water can't run back up the handle. Hope this helped and I will talk to you soon Bye guys SparkleEyes x

Another Haul! Millies Cookies, Superdrug and more!!

Image
Hey guys  So I went shopping again today and recorded my Haul video, so hope you guys like it :)

Top Tip 2: Preventing Nail Polish Staining Your Nails

Hey guys  Today's top tip of the day is how to prevent nail polish staining your nails. If you do not paint nails properly, chances are you can end up with stains on your nails and are quite difficult to get rid of. If you don't have a proper specialized base coat, you can just simply paint a clear coat on your nails first. Also if you do this I find it helps the colour go on smoother and easier. So, I apologize for no tip yesterday I forgot :/ Anyway, I will try and get the next top tip of the day up tomorrow and I will talk to you guys later Bye :) SparkleEyes xx

Top Tip 1: Applying Nail Art Rhinestones

Hey everyone So I want to start this new thing that helps me to remember to post something on my blog each day, and I want to post a top tip of the day just for fun and to help you guys out, whether its tips on organizing wardrobes or applying polish, I will try to get one tip of the day up every day.  Today's Tip of the Day is applying nail art rhinestones. Rhinestones are a great way to add a bit of glam and diva to a look, whether its to do with beauty or not. The other day I purchases a gemstone wheel that is actually for cards but they work just as fine on nails as well. They are called 'Anita's gemstone wheel' and the one I got was £3.50 and you get different sized silver and gold gemstones. To easily apply them without getting in a mess, once you have a desired nail look done, paint over your nails with a nail glue. Take the tip of a cotton bud, dotting tool, tweezers or even a cuticle pusher, whatever works for you, and dampen the tip if need be. Choose w

Haul! Superdrug, Poundland, Ryman and more!

Hey guys Yesterday I went shopping in town with my Grandma, Uncle and Cousin and I bought some things there and I have filmed a video for you so hope you like it :) I am splitting the video into three: the first part is beauty, the second jewellery and the third is back to school supplies  SparkleEyes x

Flower Nail Tutorial

Image
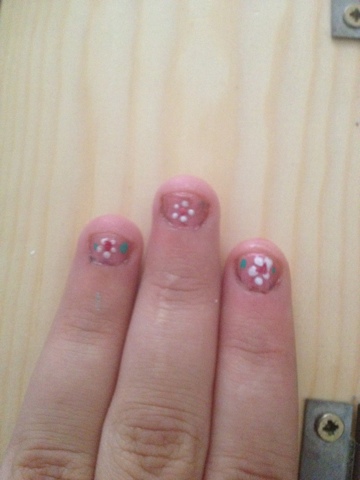
Hey strangers I am so sorry for promising tutorials and never actually getting round to them so I have recreated this nail look from my holiday destination for you guys. This look is quite difficult to do and works on long and short nails. You need a steady hand and lots of patience in order to do this. First apply a base coat and any nail polish colour (dark colours are best but not green, white or hot pink). I am usin a lighter pink. Take the end of a cocktail stick and a white nail polish. Transfer the colour on the nail brush to the top of the cocktail stick and create five or six dots in a circle. Turn the cocktail stick over and take either a hot pink or a yellow and create one dot in the centre of the circle you have just created. Finally, use a cocktail stick and a green nail polish to create two dots either side of the flower. Finish with a top coat and voila :) I hope you guys liked this and I will see you guys soon :D SparkleEyes x Sorry the pics are jum

Just a little update

Hey guys Sorry I haven't been blogging these last few weeks I have not had anything to blog about!! Anyway as I write this I'm waiting in da airport so that means there are no blogs on this blog for three weeks but will try to do some blogging on TBH while I am there. So I will talk you you guys when infer back Hasta Leugo!! (I'm not going to spain by the way) SparkleEyes x

ELF Cosmetics Review

Image
Hey Guys As you might have known, I purchased an order on ELF on Saturday and received the order on Tuesday. This post is the review and because I am at my work experience placement, unfortunately the video will have to be put up later today or this week. Anyway, this is the review and the first thing I must comment on is the speedy delivery. I ordered it at the weekend so I knew that it wouldn't be dispatched until the next working day so I was expecting a wait. What I like about ELF, they send you an email when the package has been dispatched and will tell you when the products are arriving (mine said 1-5 working days). On Tuesday I didnt have to go in to my placement and quite glad I didn't because my order came that day. As much as I love ELF, their packaging can be improved massively. One of the products I ordered was the Beauty Makeup Clutch Palette thing and the actually pallete wasnt even half the size of the box it came in. It seems to be that 40% of the money yo

Water Marble Nail Tutorial

Image
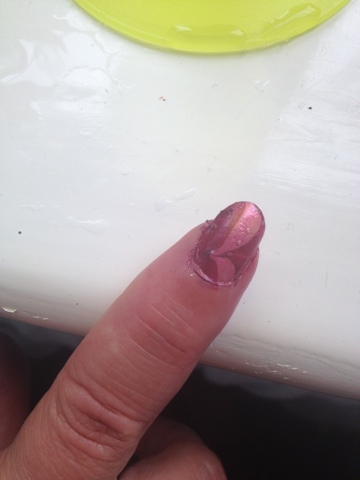
Hey Guys Literally about 30 minutes ago I did some water marble nail art on my mum and we turned out with one successful nail out of the ten we did!! But it is my firs time doing water marble on someone else.. Anyway, you will need a cup of roughly Room temperature water, cocktail sticks and at least two nail varnishes. Sellotape is optional. If you want, wrap the area around your nail with Sellotape as it prevents any nail polish getting on your skin. Apply a clear coat to prevent your nails getting stained. Create a bullseye in the water and use a cocktail stick to create a pattern. Dip in your nail in the desired area and remove after 30 seconds. Remove the nail polish around the nail (if any is there) and put a clear coat on top once dry. You will probably need to change the water after two or three nails because is does affect the results. Have fun experimenting with different colours SparkleEyes xx

Leopard Print Eyes Tutorial

Image
Hey guys Now I am going to upload a video that has been on my YouTube account for about two years and I finally got round to uploading it. It is possibly one of my favorite eye makeup look EVER because any of you that know me will know I am obsessed with leopard patterns, so what's better than a leopard print eye tutorial? I hope you like the video and have fun experimenting.  SparkleEyes x 

Summer Statement - Shoes!

Image
Hey guys!! Instead of doing the holiday clothes haul, I'm doing my summer shoe statement. It's basically just photographs of the shoes i'm taking on holiday with me, and also just ideas for shoes to take in holiday..

Beauty UK Lip Lust

Image
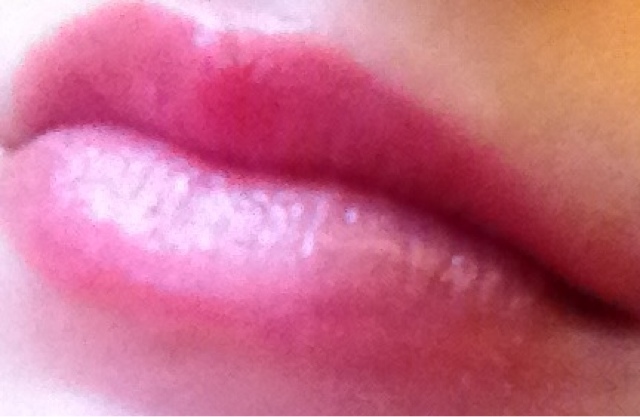
Hey guys I went to town today with my mate and in Superdrug I got a product from Beauty UK called Lip lust. It is shade 5 and a really pretty sparky pink called Barbie girl. I really liked the colour of this and price is £3.99 from Superdrug Bye guys x

Review of Barry M Cosmetics - Liquid Eyeliner

Image
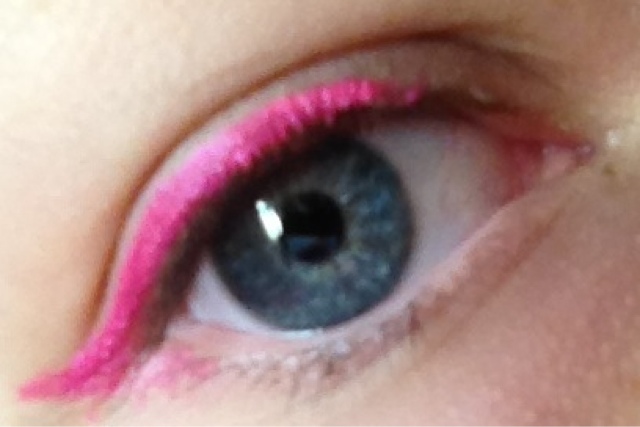
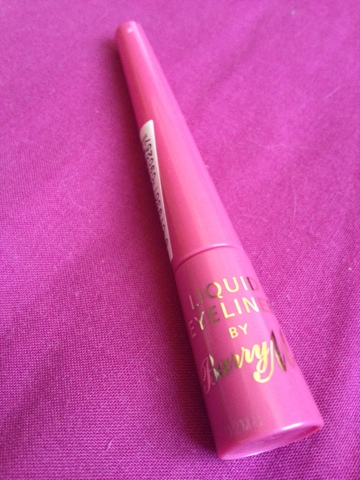
Hey everyone So as you may now I bought a liquid eyeliner from Barry M in Superdrug today. My first impression on this product was that it is quite small for the price - could be a bit bigger or a bit cheaper. The pigmentation of the product is amazing! The shade I have is a bright neon pink which really stands out and is so bright - but the colour pay off is great. The liner lasts for ages - I tested it in my hand in the shop at 1pm and It hadn't smudged 7hrs later. A disappointment with this product is that its not that easy to get off. My makeup wipes remove makeup easily but it doesn't remove this eyeliner easily - its like it stains your lash line temporarily but it does eventually come off. So there is mixed reviews on this product but it is quite good. SparkleEyes x

Beauty and Jewellery Haul

Image
Hey guys Got back from shopping just now and I bought some things in Superdrug and Poundland. MUA clear nail varnish MUA lipgloss shade 5 Barry M liquid eyeliner 21 pink Rimmel Vinyll Max lipgloss maxi shine Rimmel Vinyll gloss Jewellery from primark Necklace - pink and silver cluster feather necklace Bracelet - peach bead bracelet

Good Things Range Review Continued

Image
Hey guys I have just come back from shopping and while I was there I bought another Good Things product. I got the soothing exfoliating scrub for £3 or around that - it was a third off in Sainsbury's and was originally £4.99. It's a really nice soft exfoliator that isn't too harsh on your skin and it smells really good and has superfruit extracts which is kiwifruit and papaya so is really good for your skin. I really would recommend this brand because it's not too expensive and you get a good amount of product for the price. Good things is available at Sainsbury's , boots and Superdrug. Hope you try this brand because it really is amazing - read my other blog posts about this brand Love SparkleEyes x

Red Lips Tutorial

Image
Hey guys I realised I hadn't done a tutorial lately so I decided to do a few looks this weekend so today I am showing you how to do the perfect red lip :) Begin by applying a lip primer and a lip softener. Next, apply a light coverage of concealer on your lips to make the colour more vibrant. Line and fill your lips with a red lip liner. Apply a red lipstick and a sparkly red lipgloss. Wipe off any access off your lips and clean up any smudges around your lips. Voila :) Hope you enjoyed this look and watch for more tutorials coming this weekend to a blog near you x SparkleEyes x