Sweet as Peach // Valentines Day Makeup Tutorial
Welcome back everyone! In my last post I talked about the Too Faced Sweet Peach palette and as promised, this post is a tutorial using some of the shades from the palette to create a soft and wearable cut crease which is perfect for a Valentines Day look.

As always, I am priming my eyelids using the Too Faced Shadow Insurance. I am also sticking tape against my eye to get the sharp edge. The first shade I am using is 'Georgia' and with a fluffy blending brush, I am applying this all the way through the crease.

Moving onto the next shade which is called 'Just Peachy', I am layering this right underneath the first shade and blending until I get a gradient.

I am adding further depth into the crease with 'Summer Yum' and then patting 'Delectable' on the outer corner. I then blended this shade into the crease and towards the brow bone ensuring the most colour is on the outer corners.
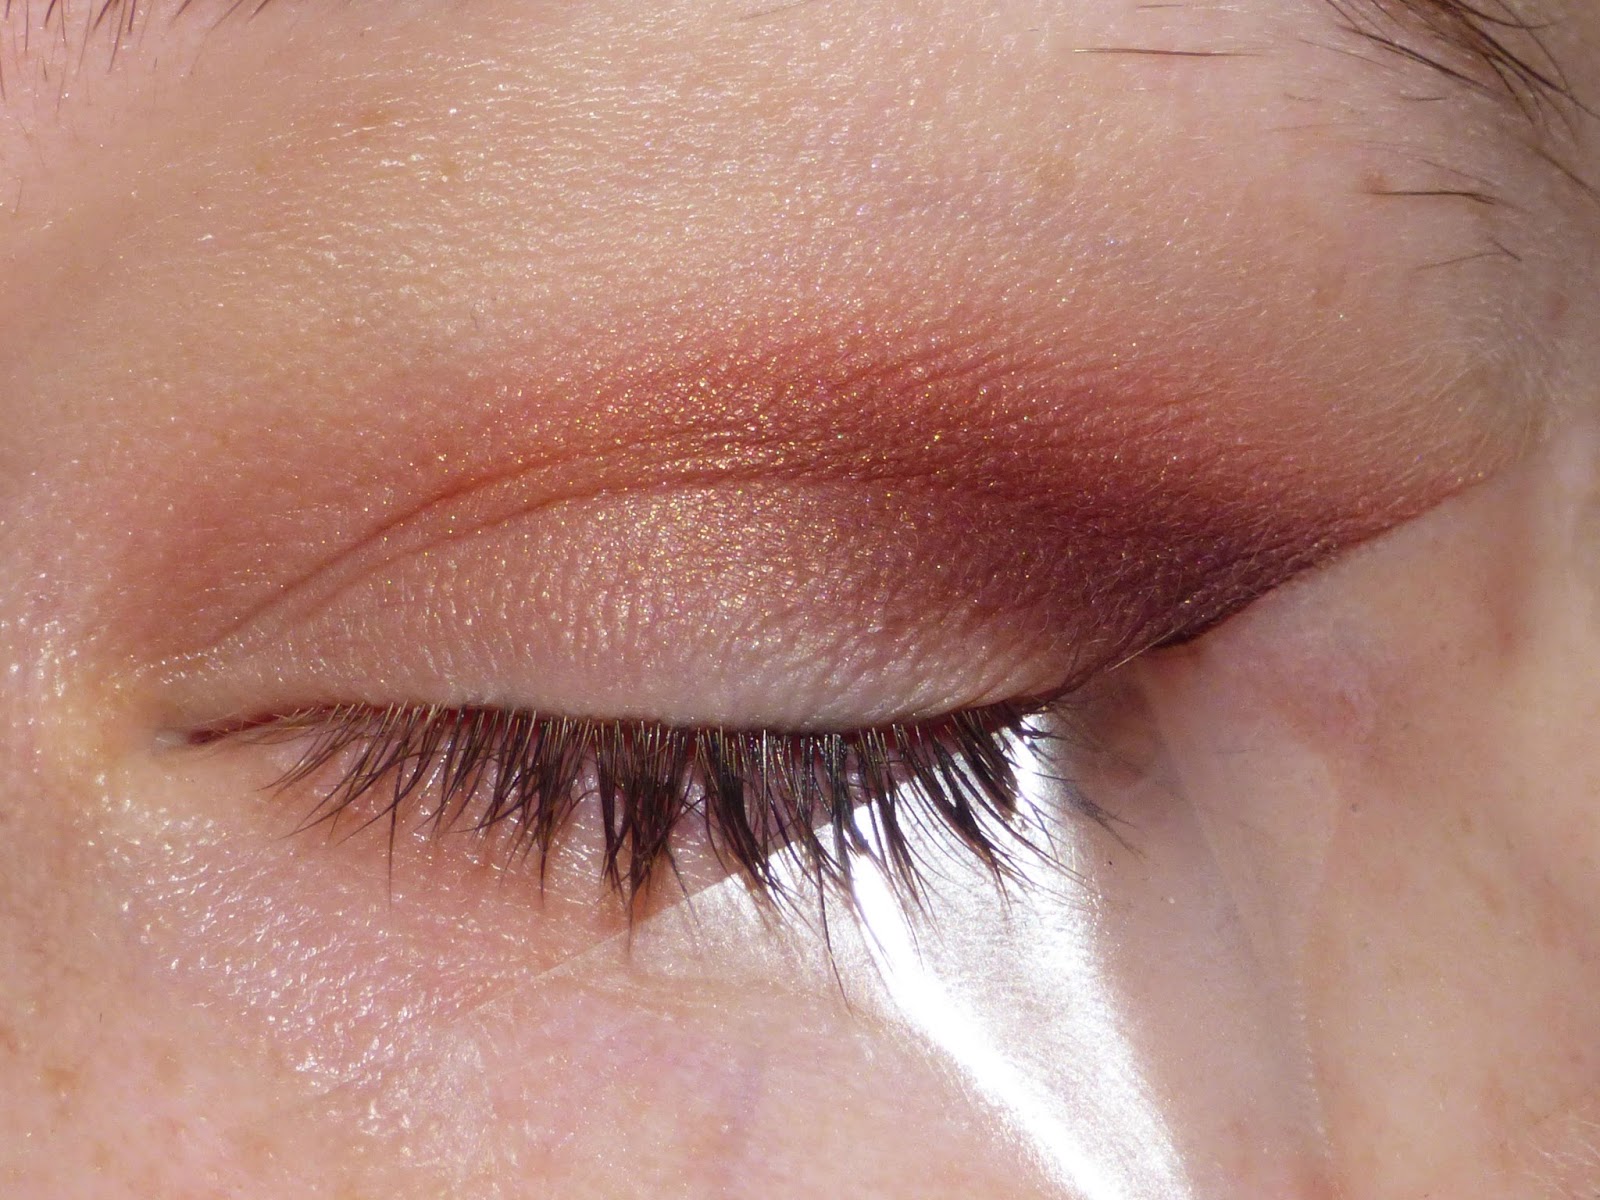
My favourite technique to a cut-crease is to carve out the lid using concealer. Take a cream concealer, something that's thick in consistency like the MAC Pro Longwear or the NYX HD Concealer that is in the jar - a liquid concealer would crease to easily and won't be as effective. I am using a precise brush to fill in the lid and tracing the crease out.

Over the top, I am patting the shade 'Nectar' ensuring I cover all the concealer.

As an optional step, which I actually wish I had left out, I used a small brush just to go over the crease line with 'Tempting' and then I blended it up into the crease colours.

Finally I patted some fine glitter dust over Nectar and added my winged liner.

The final step is to curl your lashes and apply mascara and add some lashes if you want to!

With this look, you can pair the eyes with a nude lip or a bold peachy pink lip. I really hope you guys like this look, tell me in the comments below if you have tried the Sweet Peach palette and what you think of it.
Beth x


Comments
Post a Comment