Masquerade Ball Inspired Makeup Tutorial
Last week was our Sixth Form Leaver's Ball and I originally was going to do a 'Get Ready with Me' post but I decided to do a tutorial for the makeup look I wore instead. I used the Makeup Revolution Give Them Nightmares and Unicorns Unite palette to complete the look. You can change the lid colour to whatever shade you want to make it more suitable for you. My dress was a dark midnight blue colour so I matched the shades in the eye makeup.


I began with my eye makeup because I was using dark colours and I could clean up any fall out before applying my face makeup. I applied the Beauty UK Prime FX all over my lids and blended out and then blended some of the Barry M White Eyeliner all over my lids to enhance the vibrancy of the eye shadows.
I am sticking a piece of sellotape against my eye at the same angle that I would flick my eyeliner wing because I want to create a sharp edge.
From the Unicorns Unite palette, I am buffing the shade 'Buttercup' through the crease as the lightest transitional colour.

The with the same blending brush I am buffing the shade 'Unite' from the same palette all the way through the crease as my second transitional colour.

Then with a precise crease brush, trace the shade 'Horn' from the Unicorns Unite palette in the crease then and then blend with a denser blending brush to create a gradient between the dark and mid toned brown.

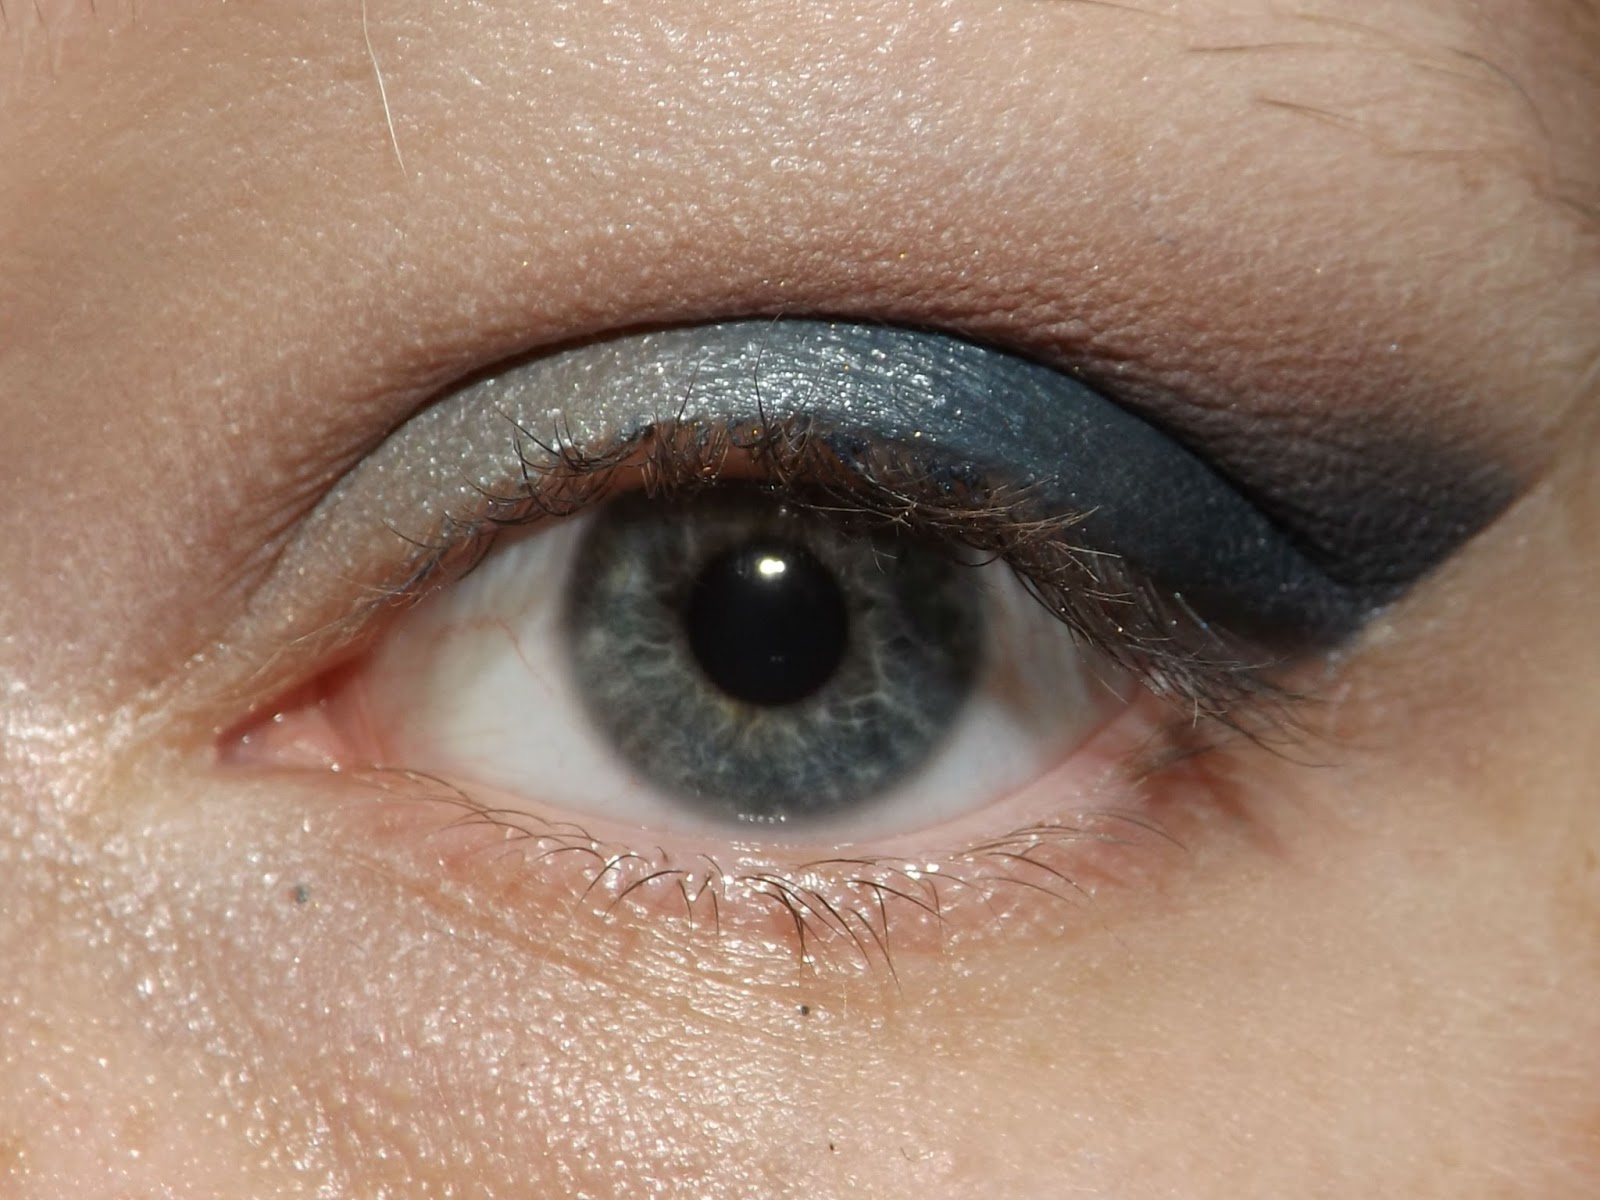
Using the shade 'Legend', I am patting this all over the lid.

Moving onto the Give Them Nightmares palette, I am taking the colour 'Danger Coming' and patting a nice opaque layer of this on the outer half of the lid and blending with a first lid colour. This colour you can change to suit you or your outfit. My dress is the same shade of blue so this works really well so you can just alter the colour of the pigment to make it more suitable for you.

I am using the shade 'Darkness' with a synthetic angled eyeliner brush and tracing the edge of the tape and then flicking the colour slightly into the crease and then blending. I am continuing to blend until there is a transition of colour and no harsh lines.

With a clean blending brush, I am softening the edge of the lighter crease colours with 'Pure' from the Unicorns Unite palette.
The next step is to add a thin line of liquid liner to the upper lash line, curl your lashes and apply mascara. Take a black kohl pencil to line the upper and lower waterline and I then added some false lashes to finish off the look.

Moving onto face makeup, I began by applying the MUA Cosmetics Pro Base Primer all over my face and buffed in using a buffing brush. I then added some of the Maybelline Baby Skin Pore Eraser Primer on my T Zone.
My skin had quite a bit of discolouration so I used some colour correctors to counteract the redness and blue tones to hide them a bit easier. I used foundation with a slightly higher coverage but still light enough for me to feel comfortable in so I used my favourite Maybelline Dream Flawless Nude in the shade 10 Ivory and concealed any other areas that needed a bit of extra coverage using the Collection Lasting Perfection Concealer.
I did some contouring and highlighting with the MAC Bronzer in Golden and the highlighter from the Makeup Revolution Contour Kit and then set my face makeup with the MUA Pro Base Matte Satin Pressed Powder and this also mattifyed my face at the same time. I am buffing this in in small sections of my face to help the contour and highlight blend together.
I lined my lips using the MUA Lip Liner in Nougat and then used the Natural Collection Lipstick in Caramel and added a touch of nude lip gloss. I then blotted the excess and sealed my lipstick with the Rimmel Lipstick Lock.

I finished off with a spritz of the MUA Pro Base Fixing Mist to create an extra barrier to keep my makeup in place all night.
SparkleEyes x


Comments
Post a Comment